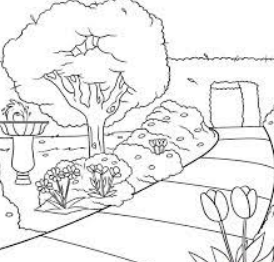
Draw a garden in just seven easy steps! Few things are as relaxing and rewarding as growing your garden. You can choose from a vast range of different plants, flowers, and even vegetables to populate your garden, and it’s a great way to bring bright color and life to your garden. However, it can be expensive and time-consuming, so sometimes, learning how to draw a garden can be the best thing you can do! At the end of the guide you have in front of you, you will be able to design your beautiful garden. We hope you have a great time working with us on this guide on how to draw a garden! Drawing of a flower
How to Draw a Garden – Allows Reach Initiated!
Step 1
This garden you will work on will be filled with simple and beautiful flowers, and we will draw the first of them in this first step of our guide on how to draw a garden. To start this flower, we will draw a circle for the center of the flower. Next, we will remove five large round petals on the flower, and the petals on the right will have some small gaps. These gaps will be there because they will be the areas where the next flower will touch this one. Then we will finish this step by drawing straight lines for the trunk and adding a leaf on the left side of the chest. Then you are ready to attract more flowers in the next steps of the guide, so let’s continue!
Step 2 – Draw another bloom for your playground.
Now that you have drawn a flower for your garden drawing, you should have no trouble drawing another one! This flower will look much like the first, except slightly smaller. The petals of this second flower will also fill in the gaps you left in the petals in the previous step. Also, this flower will have two leaves on the stem instead of the first.
Step 3 – Following, drag the third bud.
For the third step of our guide on drawing a garden, we will draw another flower. This one will be about the same height as the previous one, but the stem will be slightly shorter, making this flower stand lower than the last two. Like the first flower, this one will have a leaf on the left side. There will also be a slight gap on the right petal, and another petal will be folded over there.
Step 4 – Now count another bloom.
We will draw the fourth flower in this step of your garden drawing. This flower will be the same size and height as the second and will have two leaves like that. Then there will be just a flower and some final details before adding some fantastic colors to the image.
Step 5 – Next, draw the last flower in the garden
It’s time to draw the last flower for this guide on how to draw a garden! You have this, so you should have no problem doing it. This flower will be about the same height and size as the first, but unlike it, it will have two leaves on the stem. Once you’ve drawn all five flowers, you’re ready to add some final details in step 6!
Step 6 – Now count the hay and last attributes.
All of your flowers are drawn now, so for this step of removing your garden, we’ll finish with a few final details before the last step. First, we’ll use sharp curved lines between the flowers to grow grass. Next, we’ll add vein detail to all the leaves of the flower stems for added realism. Before going any further, you can add your details to finish it! You can opt for many ideas; we will cover a few now. You can draw beautiful insects like butterflies and buzzing bees or draw a beautiful sky over the garden. Another idea would be to draw a background, which would be an excellent opportunity to add some of your favorite flowers to the image. We have a few ideas, but what else can you think of to complete this garden design?
Step 7 – Complete the picture of the green with some color
You have reached the last step of this guide on how to draw a garden! You can have a little fun adding unique colors to your image for this step. Our sample image showed you just one way to paint your image with beautiful colors. You can use these colors for your image, but you can also experiment with your favorite colors to make it stand out.